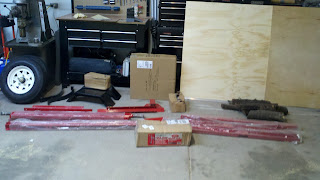
This is the box of trailer parts that showed up in the mail after I got tired of looking at Teardrops and decided to build one. I decided the spare tire and front jack was a good investment.
This is the trailer under assembly, along with one of the side panels to check for length. Looks like I'm going to have cut part of the back off to make the trailer match the length of the side wall.
Here's one of the walls I cut. It's the profile that the trailer will have when it's all finished. Notice the huge door. Should be easy to crawl in and out of.
Most of the trailer is assembled, and floor framing has started. This is the beginning of the floor framing. The two pieces of plywood are actually "hidden" storage, and will be accessible via hatches in the galley and the kitchen. The floor is framed with some 2x4s that I cherry picked out of the stack at Home Depot. I got lots of dirty looks, but a man's got to do what a man's got to do!
More Trailer sub floor stuff.
I finished framing the floor, and started painting the bottom with asphalt emulsion to help keep moisture out. Careful with this stuff, I almost lit the whole trailer on fire tonight when my router kicked some sparks into some wood shavings and lit a fire. Very exciting for awhile in the ole' garage tonight!
After painting the bottom of the trailer with the emulsion, I laid 3/4" insulation down and covered it with sheet aluminum. The remaining black plywood in the floor will be routed out and be used as access holes for the hidden hatches.
Here's another pic of the floor
Insulation getting laid out before covering with sheet aluminum
Yep, here's the floor again.
Trailer at an early stage of the build
The trailer floor is now bolted to the trailer, and all of the hidden compartments have been cut out. Next step is to start framing in the hidden compartments, and then once that's done, put some lids on them.
Here's a closeup of the spare tire that I installed on the bottom of the trailer tonight. It's held in with carriage bolts suspended from the floor. The floor has been reinforced with 3/4" plywood here that is covered in insulation and aluminum. The wing nuts are secured with pins to prevent backout.
Here's another picture of the spare mounted below the trailer.


